
How to Make Collapsible Sections in Excel
Group Excel rows into independent collapsible sections while keeping summary rows visible. Includes an example workbook and troubleshooting.
To make collapsible sections in Excel desktop for Windows, select the detail rows, choose Data > Group > Rows, then use the minus and plus outline buttons to collapse or expand them. Leave the summary row out of your selection so it stays visible.
The steps below create three independent sections in a project plan. They apply to Excel desktop for Windows. Outline settings and file behavior may differ in Excel for the web and Excel for Mac.
What You'll Need
- A supported version of Microsoft Excel desktop for Windows with access to the Data tab
- Download the Collapsible Excel Project Plan
- Optional: Copy the Google Sheets version to inspect the same example online
Step-by-Step Guide
Identify the summary and detail rows
Open the Collapsible Plan sheet. It contains three workstreams:
| Workstream | Visible summary row | Detail rows to group |
|---|---|---|
| Discovery | 10 | 11:14 |
| Build | 15 | 16:19 |
| Rollout | 20 | 21:24 |
Select only the detail rows. For example, including row 10 in the Discovery group will cause its summary to disappear when you collapse the section.
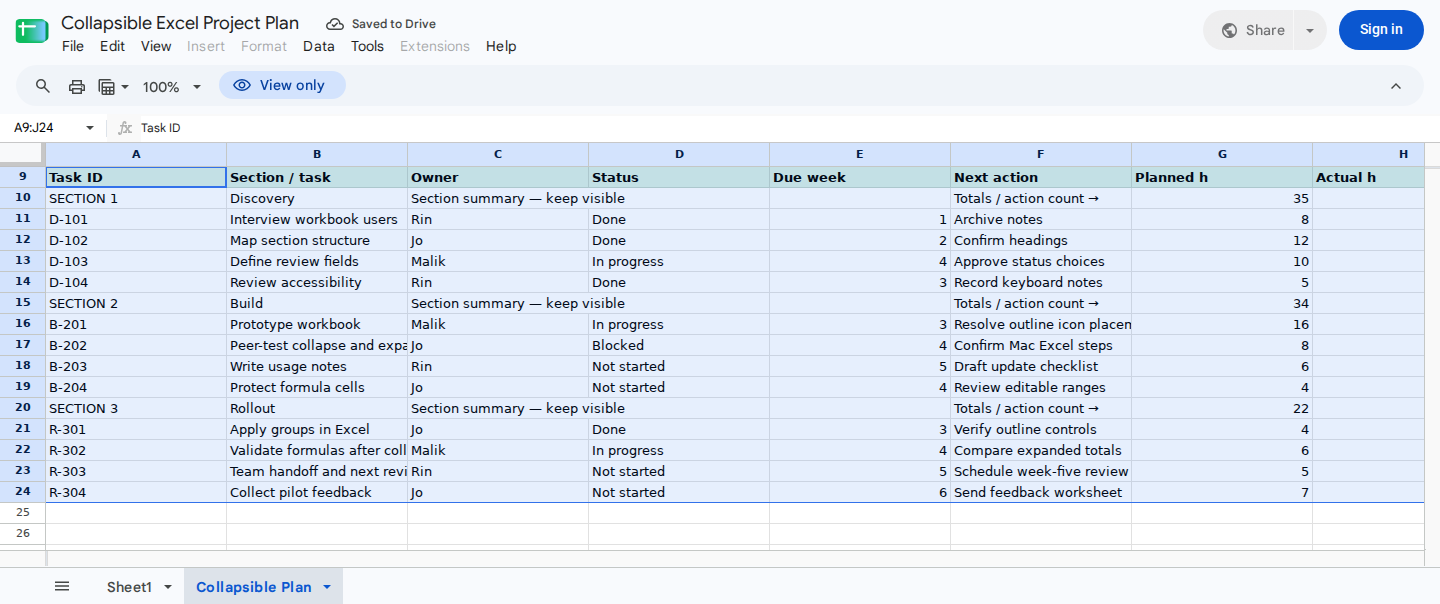
Group rows 11:14, 16:19, and 21:24 so Discovery, Build, and Rollout can be collapsed independently while rows 10, 15, and 20 remain visible.
The workbook’s editable areas are:
- Review week:
B2 - Task inputs:
A11:H14,A16:H19, andA21:H24
Don’t overwrite B5:B8, G10:J10, G15:J15, G20:J20, or the formulas in columns I:J.
Position the outline controls for summaries above details
Each summary row in the workbook sits above its detail rows. Before creating the groups, adjust the outline options:
- Open the Data tab.
- In the Outline section, select the small dialog-box launcher.
- Clear Summary rows below detail.
- Select OK.
This setting positions the outline controls consistently with summary rows 10, 15, and 20. If Summary rows below detail remains selected, the summaries can still stay visible, but Excel associates the controls with the area below each group.
Microsoft explains these options in Outline (group) data in a worksheet.
Group the first detail section
Start by creating the Discovery group:
- Select rows
11:14by dragging across the row numbers on the left. - Open the Data tab.
- Select Group > Group.
- Choose Rows if Excel asks whether you want to group rows or columns.
An outline control should appear beside the selected rows. Select the minus button to collapse the group. Rows 11 through 14 should be hidden, while row 10 remains visible.
Next, select the plus button and confirm that all four detail rows return.
Create the other independent groups
Repeat the process for the remaining workstreams:
- Group rows
16:19for Build, leaving row 15 outside the group. - Group rows
21:24for Rollout, leaving row 20 outside the group.
To test the setup, collapse only rows 16:19. The Build details should disappear, while the Discovery and Rollout details remain expanded.
Be sure to create each group separately. Grouping rows 11:24 in one operation produces a single collapsible block instead of three independent sections.
Collapse and expand sections during a review
Use each minus button to hide its detail rows. Because the summary rows remain visible, you can quickly decide which sections to open.
The supplied workbook has a recorded week-four reference state with:
B6 = 2tasks needing actionJ10 = 0for DiscoveryJ15 = 2for BuildJ20 = 0for Rollout
These are recorded calculation results from the complete Google Sheets fixture, not evidence of Microsoft Excel recalculation. You don’t need the arithmetic to create the row groups. After opening the downloaded file, confirm the displayed results in your Excel environment.
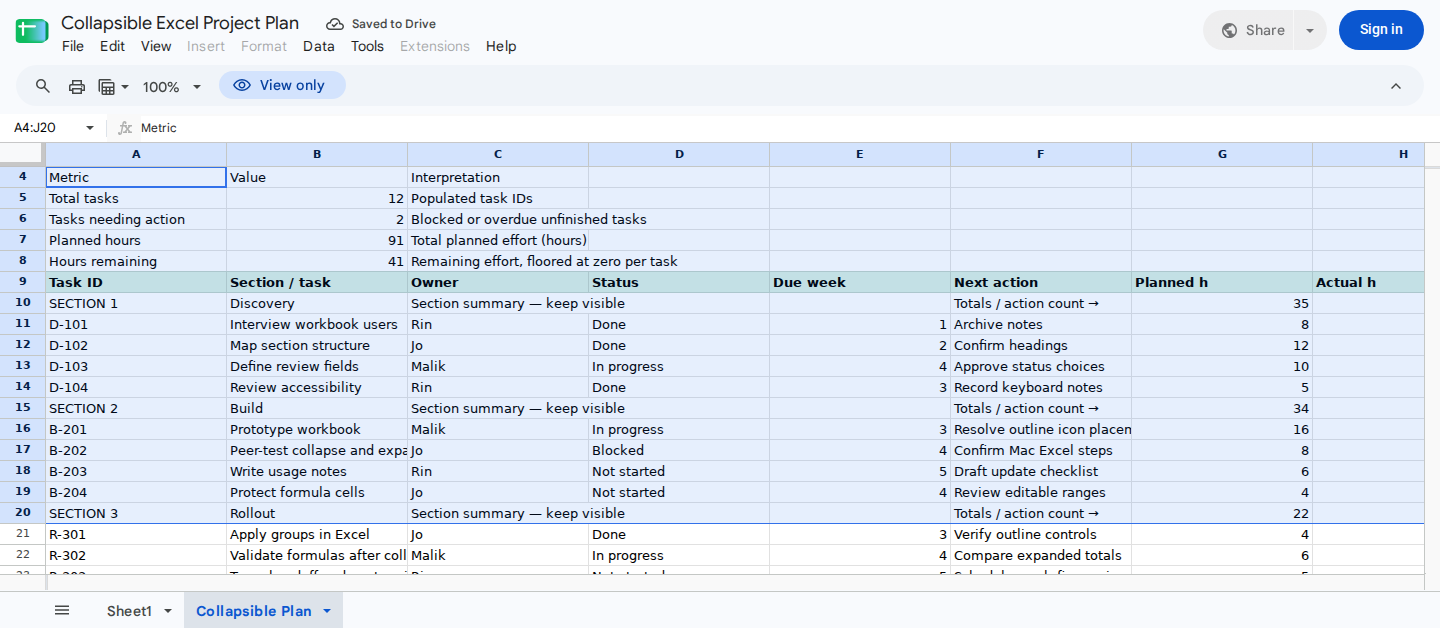
During a collapsed weekly review, B6 and the section counts in J10, J15, and J20 identify which workstreams need to be expanded.
When all sections are collapsed, rows 10, 15, and 20 should remain visible. The reference values point to Build as the section to expand because J15 contains the only nonzero section count.
Grouping doesn’t rewrite formulas or remove the underlying records. Instead, it marks the collapsed detail rows as hidden. As a result, formulas configured to ignore hidden rows can return different values.
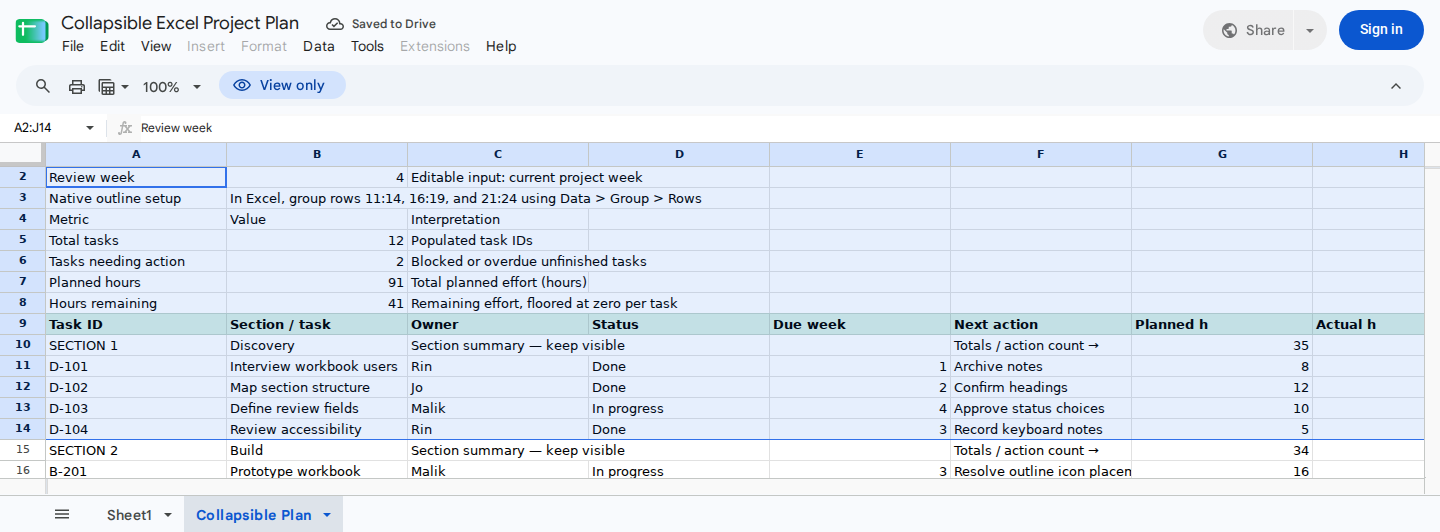
Edit the review week in B2 and task inputs in A11:H14; the overall and Discovery summaries recalculate before the detail rows are collapsed.
Correct an incorrectly grouped section
If a summary row disappears, you probably included it in the group:
- Expand the affected section.
- Select all rows in the incorrect group.
- Choose Data > Ungroup > Rows.
- Select only the intended detail rows.
- Choose Data > Group > Rows again.
For example, grouping rows 10:14 hides the Discovery summary. Ungroup that range, then recreate the group using rows 11:14.
The summary might remain visible even if the outline control appears below the details. In that case, return to the Outline settings and clear Summary rows below detail.
Remove a group or check the saved workbook
To remove a collapsible section without deleting its contents, select the grouped detail rows and choose Data > Ungroup > Rows. The outline control should disappear, while the cell values remain unchanged.
For groups you want to keep:
- Save the workbook in Excel desktop for Windows.
- Close the workbook.
- Reopen the saved file.
- Test each plus and minus button.
This process checks the grouping behavior in your Excel desktop environment. It isn’t a calculation test.
Prepare the detail rows with ModelMonkey
ModelMonkey can inspect spreadsheet context and help organize or change workbook content through natural-language instructions. You’ll still use Excel’s native outline command to create the collapsible row groups.
For this project plan, you could submit the following request:
On the Collapsible Plan sheet, check the task inputs in A11:H14, A16:H19, and A21:H24 for inconsistent status labels. Use only Done, In progress, Blocked, or Not started. Don’t change formula cells.
Where the workflow presents a preview, review the proposed edits before proceeding. You can then create or check the row groups in Excel using the ranges above.
Wrapping Up
The worksheet now has three independently collapsible sections. You can expand or collapse Discovery, Build, and Rollout separately while keeping their summary rows visible.
Grouping preserves the formulas and underlying cell contents. However, formulas configured to ignore hidden rows may calculate differently when you collapse a group.
Frequently Asked Questions
Why does my summary row disappear when I collapse a section?
The summary row is part of the grouped range. Ungroup the affected rows, then group only the detail rows beneath the summary.
If the summary stays visible but the control appears below the detail rows, open the Outline settings and clear Summary rows below detail.
How do I remove a collapsible section without deleting its data?
Select the grouped rows and choose Data > Ungroup > Rows. Excel removes the outline control but leaves the rows and their contents in place.
Does collapsing rows change formulas or totals?
Grouping doesn’t change the formula definitions. Ordinary SUM formulas still include values in collapsed rows.
Totals can change when a formula is specifically configured to ignore hidden rows. Examples include SUBTOTAL with function numbers 101-111 and AGGREGATE formulas using an option that ignores hidden rows. Because collapsing a group hides its rows, check such formulas before relying on a collapsed summary.
What if the plus and minus buttons aren’t visible?
First, confirm that the rows are grouped. In Excel desktop for Windows, check the worksheet display settings and make sure outline symbols are shown when an outline is applied.
Can I follow these exact steps in Excel for the web or Excel for Mac?
The basic row-grouping feature may be available, but the location of outline settings and some controls can differ. These instructions specifically cover Excel desktop for Windows.
Does collapsing a section protect its hidden rows?
No. Anyone who can edit the worksheet can expand the group and change its contents. Use worksheet protection when you need to restrict edits; see How to Lock Rows in Excel.